Community Crops Vermiculture Project
Vermiculture: the controlled growing of worms in specialty stuctures.
Vermicomposting: using red wiggler worms (E. foetida) to decompose plant wastes into castings.
Why Use Vermiculture?
Worms are good for the garden soil for many reasons. Unparalleled as soil excavators, earthworms spend their lives ingesting, grinding, digesting and excreting soil–as much as 15 tons per acre goes through earthworms bodies in a year. These “worm castings” are richer in nutrients and bacteria than the surrounding soil. Their underground burrows also create channels in the soils, which makes the soil more porous, allowing water to move to greater depths in the soil column. Worm burrows also allows for drainage after heavy rains reducing erosion.
Worms also help plants grow better. Plant roots require oxygen and worm burrows provide passages for air to get next to the roots deep within the ground. This is called aeration, analogous to what homeowners often do to turf lawn with heavy machinery. It should be noted that these deep tunneling worms also bring subsoil closer to the surface, mixing it with topsoil that has more organic matter.
Slime, a secretion of earthworms, contains nitrogen, which is an important plant food. The sticky slime helps to hold clusters of soil particles together in formations called “aggregates.” Soil aggregates (clumps) lying next to each other permit air to move between the spaces.
Vermiculture Preparation
Using a tier system (see diagram) of worm housing along with newspaper bedding and food scraps we grew our worms over three months. Basic needs for vermiculture include bedding, moisture, and feeding.
Vermiculture bedding
Worm bedding should be damp, edible, pH neutral, easy to move through, maintaining a constant temperature. Peat moss (pastuerized), shredded white paper, shredded newspaper or cardboard or aged sawdust are typical. Add sand to provide worms with something for their gizzards. Lime also works, and is useful in controlling pH if the environment becomes too acidic.
Vermiculture moisture
Adequate drainage is necessary, 80% of plant material is water so allow for this when designing your systems. Too much moisture will produce anerobic conditions, making your system smell.
Vermiculture feeding
Any plant materials. Vegetable kitchen scraps are the best and if blended before the worms will love you. Oils, fats, meats, and dairy products should be avoided, as well as pet wastes. Avoid large pieces or woody stems, as they will be hard for the worms to digest.
What worms to use?
Compost worms should not be confused with earthworms. The best kind of compost worm to use is the Red Worm or Red Wiggler, Eisenia foetida. These worms process large amounts of organic materials in their natural habitats of manure, compost piles, or decaying leaves. Redworms reproduce quickly under controlled environments. Within the first three months you may see very small, lemon shaped orbs occasionally mixed in with the dark castings in your bin. These worm cocoons will contain two or more immature worms, requiring at least three weeks before the baby worms hatch. This is encouraged for a project like ours whereby some of are worms are going into garden beds while others will be grown as kitchen scrap composters. Worms can be ordered online by the pound.
Vermicompost Biointensive Bed
Benefits of bed include soil generation, improved soil structure and nutrient cycling, improved water holding capability, improved plant health. Sown with winter rye as cover crop in the fall of the year.
Bed dimensions 4ft x 8ft
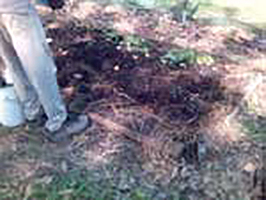
Vermicomposting Bed Preparation
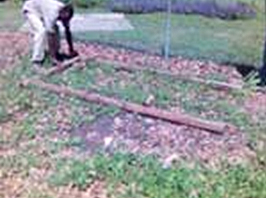
I. Double dig the bed. We forked subsoil, and added alfalfa meal, whereas on a conventional DD bed, we would have used compost. Used 15.4oz (about 1lb) on a 4 X 8ft bed, or 3lbs to every 100ft2.
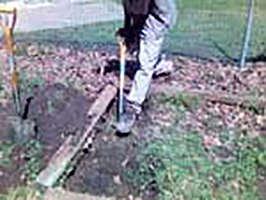
II. Shake Hay overtop finished DD bed to a uniform distribution. Wet hay moderately.
III. Worms on top of hay. We had 3, 3gallon buckets of Red Wiggler and Earth worms in preparde worm bedding. No exact recorded ratio of worms to soil per bucket or # of worms to size of DD.
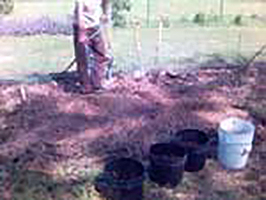
IV. Layer of newspaper, half digested compost, fresh greens and other kitchen scraps.
V. Six inches of soil on top. This becomes the layer with which you will plant in. We got surface soil from other source. (under south cedar trees) Try Organic soil source from local nursery, if alternative top soil source is unavailable.

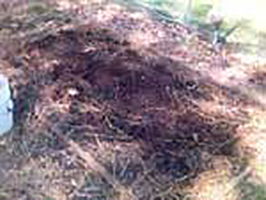
VI. Spread half composted leaf mulch around plants to suppress weeds, add organic matter and aid in water retention. Water moderately when done
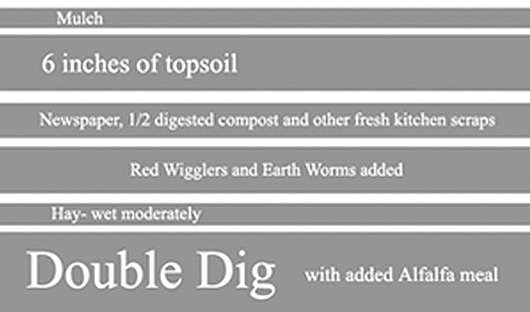
This graphic demonstrates the layering principle of the vermiculture bed. It reads from the bottom up, corresponding to the directions above.
Project Discussion
Our bed was laid out with the long side (8′) being the north and south sides, but it would have been better if it east/west to ensure maximum southern sun exposure. (Lincoln is at ~ 42 N lat.) From this point we can also address an issue of planting, As a biointensive bed the soil preparation allows for up to four times the productivity of unit area. Understanding the arrangement of plants in the bed is then necessary to ensure maximum yield. There are two observations of our bed this year that we feel can be learned from and changed for next year.
One, in relation to planting, we needed to more closely follow the hexagonal equal spacing pattern between plants, as laid out by Jeavons in his Grow Biointensive methods. To learn more information about this technique see discussion in “How to Grow More Vegetables.”
Two, plant shading is an important factor in our bed as it is laid out north/south. This means anticipating and knowing the growth pattern of seeds and transplates at the time of planting. For example this year we grew tomatoes and pepper plants on the south end, while we planted eggplant and cabbage on the north side. This was problematic as the large bushing nature of the tomatoes crowded out the peppers and shaded the eggplant, stunting their growth. Pruning throughout the season and removing certain tomato plants helped but planting the tomatoes on the North of the bed would have been much easier and increases yield we lost because of pruning. We planned this fall for a different arrangement next season as we planted garlic on the extreme south end of the bed as it will warm fast in the spring yet restrict other plant growth through shading.
Book and Website Resources
- G. Gershury, J. Smillie, The Soul of Soil, A Guide to Ecological Management. agAccess Davis, California 1995
- M. Appelhof, Mary Frances Fenton, Barbara Loss Harris, Worms Eat Our Garbage. Kalamazoo, Michigan USA: Flower Press, 1993
- J. Jeavons, How to Grow More Vegetables than you ever thought possible on less land than you can imagine. Ten Speed Press P.O. Box 7123 Berkeley, California 94707. 1974
- City Farmer’s Guide to Worm Composting — quite informative
- Compost and vermiculture bins for sale, as well as information on techniques and technology
- Website of Ecology Action, with information on soil building and double digging